
Current report format

Current sample survey report

See the current Vertex survey report before booking, with property overview, room-by-room heat-loss inputs, grouped evidence and portal-ready handover.

FormatCurrent production report EvidencePhotos and inputs grouped HandoverBuilt for office and design DeliveryPortal-ready report pack
Installer-logo free Current report format AI-assisted QC Portal delivery

The public PDF uses demonstration data. Live customer reports are delivered privately through the portal.

Current sample report pages Cover, property overview and room-by-room heat-loss pages from the current report.

What you’ll see in the current survey report

The goal is simple: let the office, design team, or installer move forward without first reconstructing the job from a gallery of loose photos. These pages come directly from the current sample PDF.

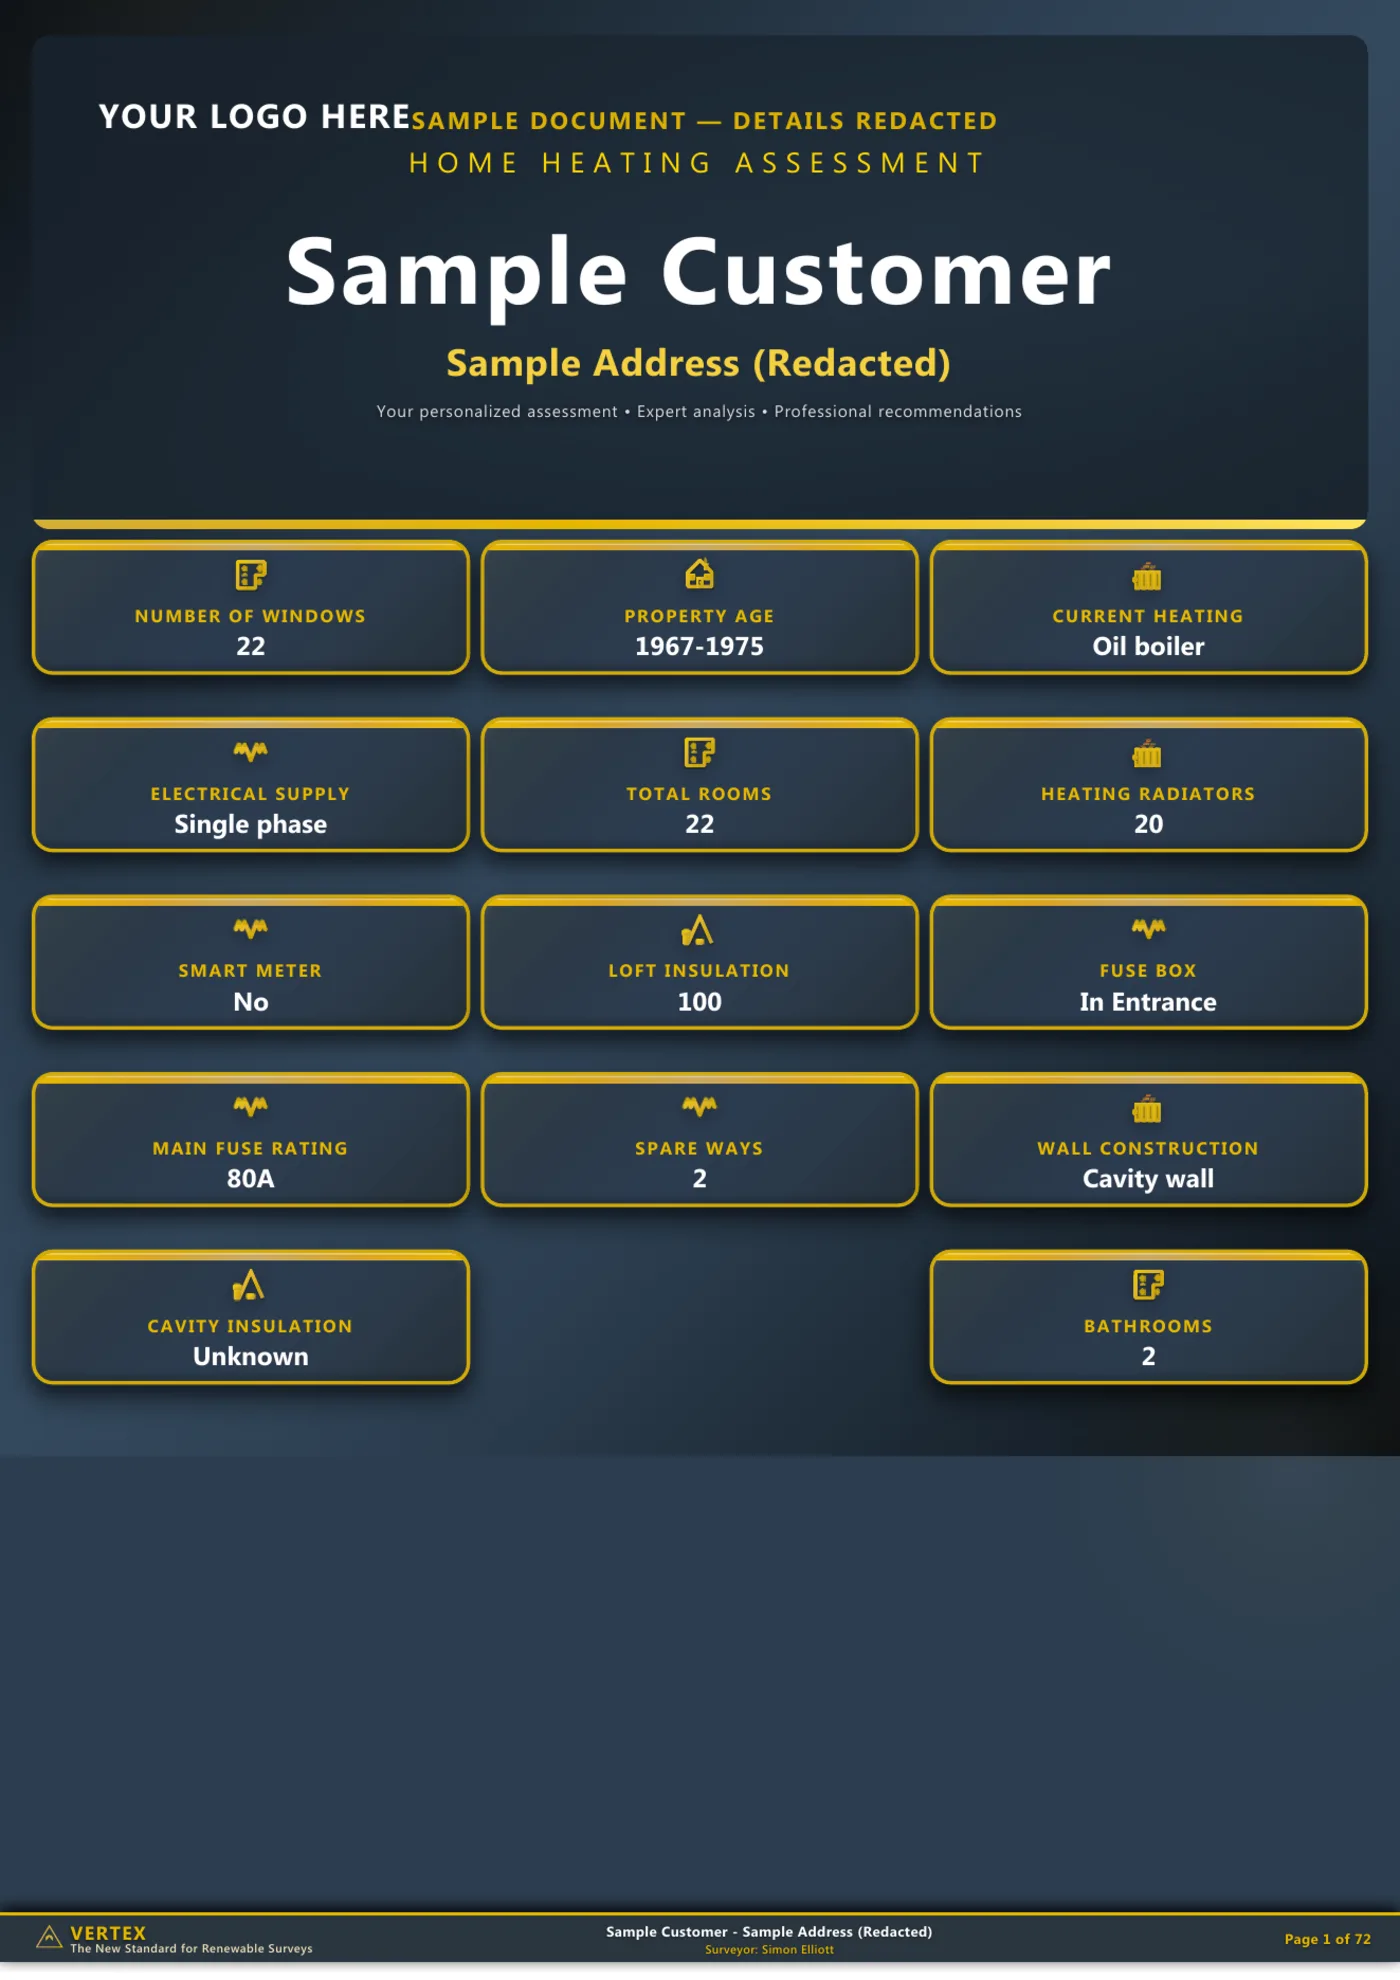
Current sample report cover page with demonstration data
Cover and job snapshot. Customer, address, property facts, recorded scope and priority findings are visible on the first page.
Current sample report table of contents
Quick-find contents. Active chapters, disabled sections, and report scope are visible before anyone digs into detail.
Current sample report property overview page
Property overview. Home, fabric, heating, electrical, install readiness, and survey notes are grouped for a fast first read.
Current sample report room-by-room heat loss table
Room-by-room heat loss. Geometry, envelope, openings, existing emitters and recorded evidence are kept together for design review.

Inside the current sample report: what makes it commercially useful

Each preview image has short practical notes so your team can judge whether the report will save time once a live job lands on someone’s desk.

Page 1

Cover and job snapshot

The front page does more than title the job. It gives installation and design teams a single first-read summary: location, property type, floor area, room count, heating context, electrical supply, and the top-level details needed before anyone dives into technical pages.

For busy teams this removes the usual start-up delay. Instead of opening several files to work out what the job is, they get one clean starting point and can move straight into review.

Page 2

Quick-find table of contents

The current report makes scope obvious. Active chapters, disabled chapters, and what each section covers are visible before the reader starts hunting through the file.

The practical win is less time searching. Teams can jump to heat loss inputs, electrical systems, ASHP location, cylinder location, photos, or installation reference without guessing where the evidence sits.

Page 4

Property overview and install readiness

The overview page groups home type, build period, measured area, rooms checked, current heating, electrical supply, loft access, cylinder context, and site notes into one readable decision page.

That reduces the back-and-forth that often appears late in the process. Instead of asking for extra context after design begins, teams can qualify readiness earlier.

Page 8

Room-by-room heat loss evidence

Room geometry, envelope, openings, existing emitters, and recorded evidence are laid out together. The reader can see what was measured and what the surveyor recorded without rebuilding the room data from scratch.

This is the difference between a report that looks complete and one that is genuinely useful. Clear grouping keeps everyone working from the same version of the job.

Use the sample report as a buying check

Before sending a live job, check whether the sample report answers the questions your team normally chases after survey day. Can the office understand the job quickly? Can design find the evidence? Can install see access, routing, electrical, and equipment constraints without asking for another explanation? See how portal auto-QC supports that report quality.

Office

The job should be easy to qualify

A useful report lets the office see the main property facts, service scope, and evidence quality before committing the job to the next internal step.

Design

The assumptions should be visible

The report should show what was captured, what could not be verified, and what evidence supports the design route. That is what turns the survey into a decision record.

Install

Site constraints should not be hidden

Access, routing, electrical, plant, loft, roof, or cylinder constraints should be easy to find so install planning starts from the same evidence as the rest of the team.